Asset
Management
System Design
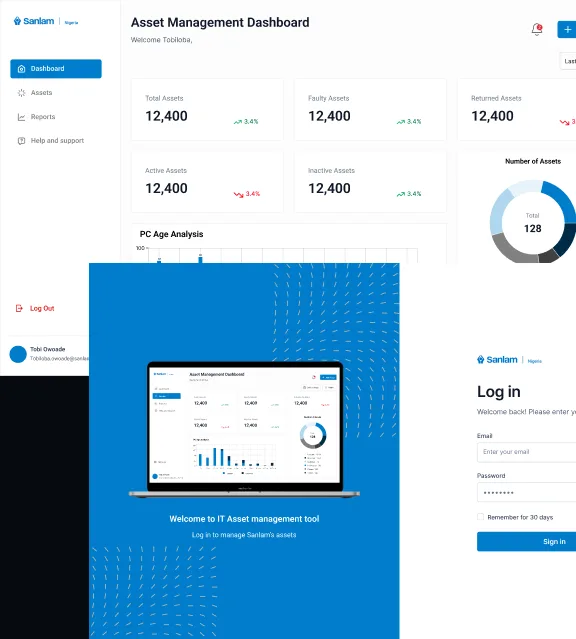
Designing a Scalable Asset Management System:
Managing 10,000+ Assets Across 20+ Locations with Real-Time Visibility

The Problem
Sanlam Insurance relied on physical assets across multiple branches, but tracking them was fragmented and inefficient.
As the company scaled, it became difficult to:
- Track which employee had which device
- Identify faulty or outdated assets
- Manage asset allocation across branches
- Maintain accurate and up-to-date records

The Solution
I designed a centralized asset management system that enables administrators to:
As the company scaled, it became difficult to:
- Track and manage assets across all locations
- Monitor asset status in real time
- Easily assign, update, and replace devices
Design Process
Understanding The Problem
Before jumping into design, I needed to understand how assets were currently being managed across the organization and where the breakdown was happening.
- Spoke with admin staff responsible for managing company assets
- Reviewed how assets were being tracked across different branches
- Analyzed existing workflows for assigning, updating and replacing assets.
How Did I Understand The Problem?
Physical User Interviews
- Spoke with administrative staff to understand daily workflows and challenges
- Made sure I spoke with at least one administrative staff in each branch, to understand if they all had the same problem or not
- Observed how assets were tracked across branches and how records were maintained
- Mapped existing processes for asset assignment, tracking & replacement.
Key Insights

Fragmented Tracking System
Assets were managed across multiple sources with no central system

Poor Asset Visibility
Admins struggled to track ownership and asset status

Inefficient Replacement Process
Faulty assets were not easily identified or replaced quickly

Data Inconsistency
Manual entry led to errors and outdated records
Design Approach
Based on the research insights, I focused on designing a system that improves visibility, reduces errors, and simplifies asset management workflows.
Particularly I made this key design decisions:
One place for all assets
I must put everything in one system so admins don’t have to check multiple sources.
Step-by-step asset creation
Split the process into 3 steps to make it easier and reduce mistakes.
Clear dashboard overview
I should show key numbers like total, faulty, active, and returned assets at a glance.
Easy updates and reassignment
Allow admins to quickly edit or reassign assets when things change.

Must be designed to handle multiple branches
Made sure the system works smoothly across different locations.
User Flow
For every design I have done, I have always prioritized having a userflow because that's the backbone of how i am going to start my ideation phase, it usually helps me to understand how I am going to design from point A to point B.
Flow 1: Login
The system is designed for internal use within the organization, so user accounts are created and managed by administrators.
Because of this:
- Users log in using their assigned email & password
- There is no sign up flow
- Password management is handled internally
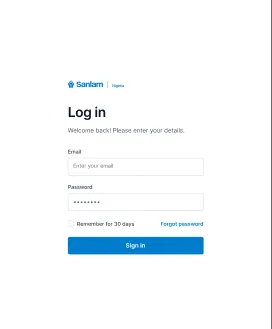
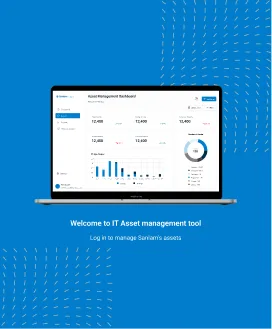
Users move from the login screen to the dashboard after login
Flow 2: Adding A New Asset
After logging in, administrators land on the dashboard where they can quickly access and manage assets. From there, they can navigate to the asset page and add a new asset.
Dashboard → Asset Page → Add Asset → Step 1 → Step 2 → Step 3 → Asset Created
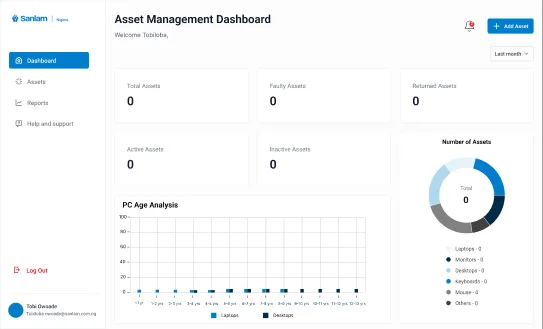
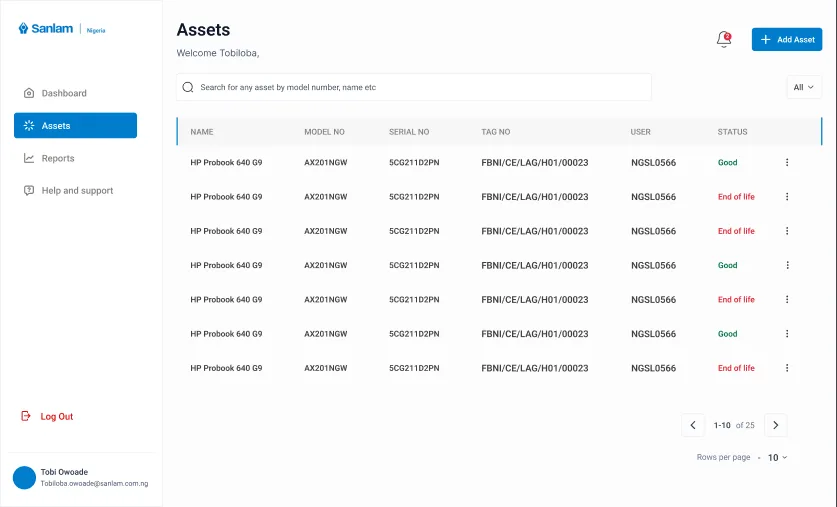
Users move to the asset page to see the asset list and ultimately add asset
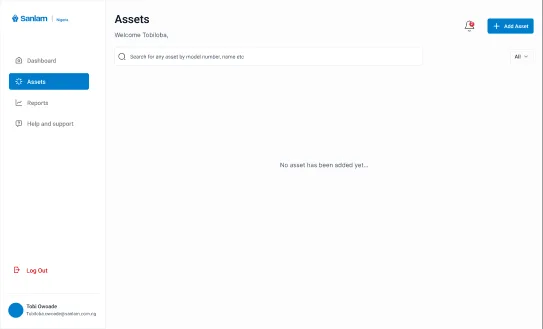
There are 3 steps to adding an asset, from the research done, it was discovered that knowing about the particular asset can give more clarity on whatever asset is with any staff
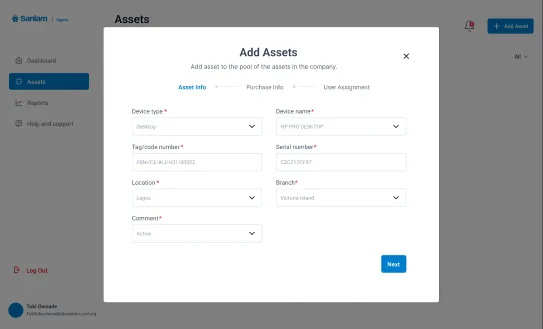
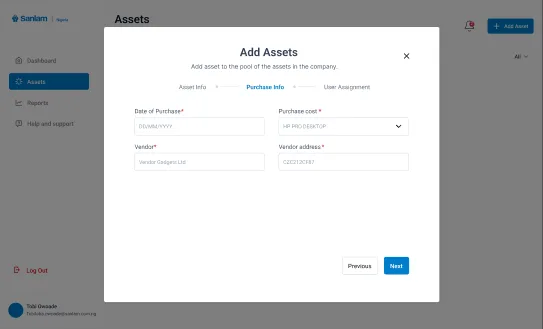
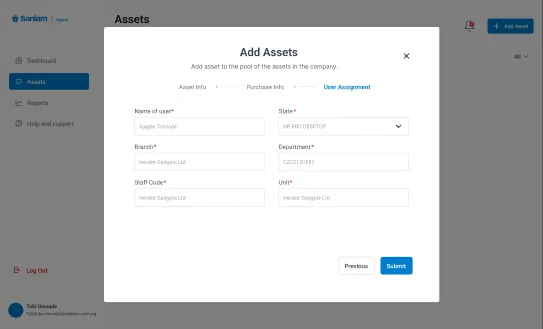
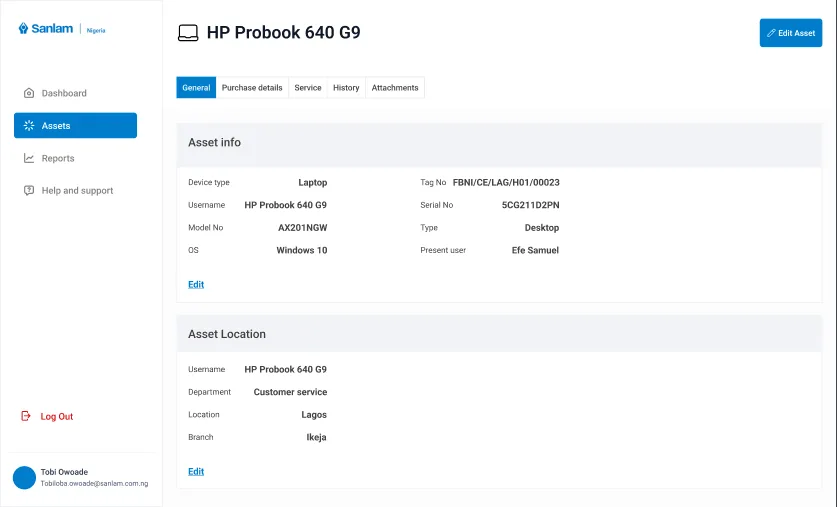
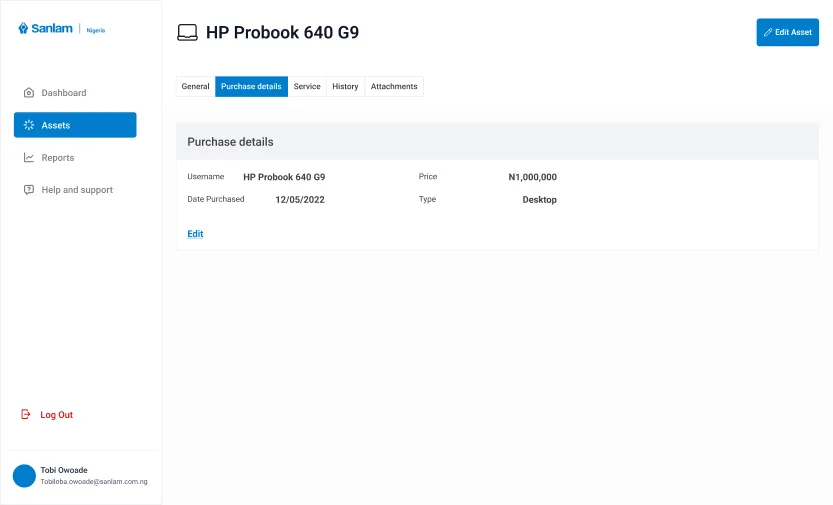
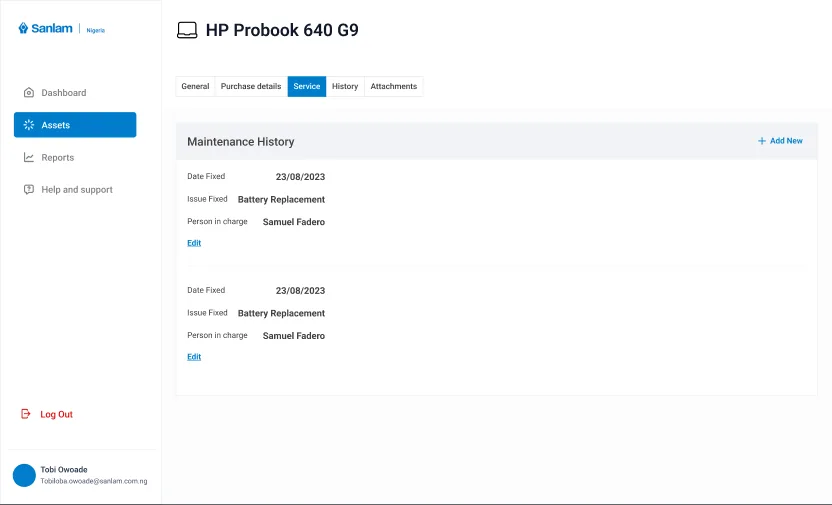
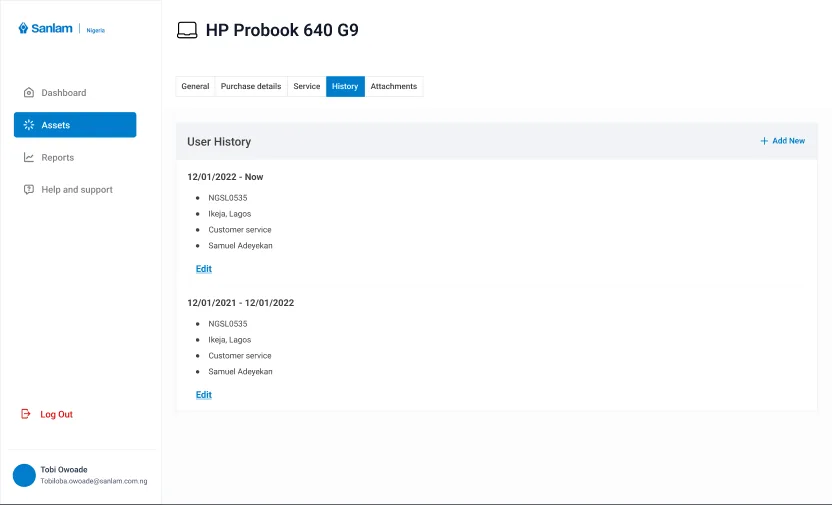
These 3 steps show that the information of every asset is well documented, and will be shown on every asset details page.
Asset Info Pages
After designing the added asset pages, it is important to show how the assets are displayed & how each information is displayed
Outcome & Impact
- Increased asset tracking speed by 85%
- Reduced errors by 80%
- Made asset replacement 80% faster
- Improved admin efficiency by 50%
The system transformed how assets are managed across the organization, giving administrators better visibility, reducing manual effort, and improving overall operational efficiency.
What I Learned
- Designing for internal tools requires balancing detail with simplicity
- Structuring data properly is just as important as designing the interface
- Small workflow improvements can have a big impact on efficiency
- Building for scale requires thinking beyond just the current use case
Role
Product Designer
Duration
2 Months
Tools
Figma
Google Doc
Canva